
I bought 4' x 8' sheets of foam insulation at Lowe's. It was around $7 per sheet. I needed 3 of them to do 32 "tiles" at 20" x 16".
I got 3/4 " thick cause I wanted it to be as light as possible yet sturdy.
I measured out 6 of them the length of the board at 16" x 6 = 96" or 8 ft.
I measured out 2 of them the width of the board at 20" x 2 = 40" so there was an 8" strip left over.

My hubby happened to have this straight edge thingy, so I used it to make quick straight lines.

I used a cheapo serrated steak knife to saw
back and forth down the foam.

The foam came with this foil stuff on one side. I thought I might be able to use it to make my "tiles" look like shiny morgue drawers.

I decided I didn't want them to look like morgue drawers, so I peeled it off each piece. It was easy to peel off.

I started with 1 4 x 8 foam board in the beginning to make sure my idea would work. We painted the cut boards before I decorated them.

I got a gallon of grey (interior) paint at the Restore for $7.
(The Restore is a discount store where everything is donated and sold for charity like a thrift store, but only house building items.)

They dried super fast in the 95 degree weather.

The second batch of foam I got, I carved the names on them before I painted them grey just to see which way was easier.
Either way was easy.
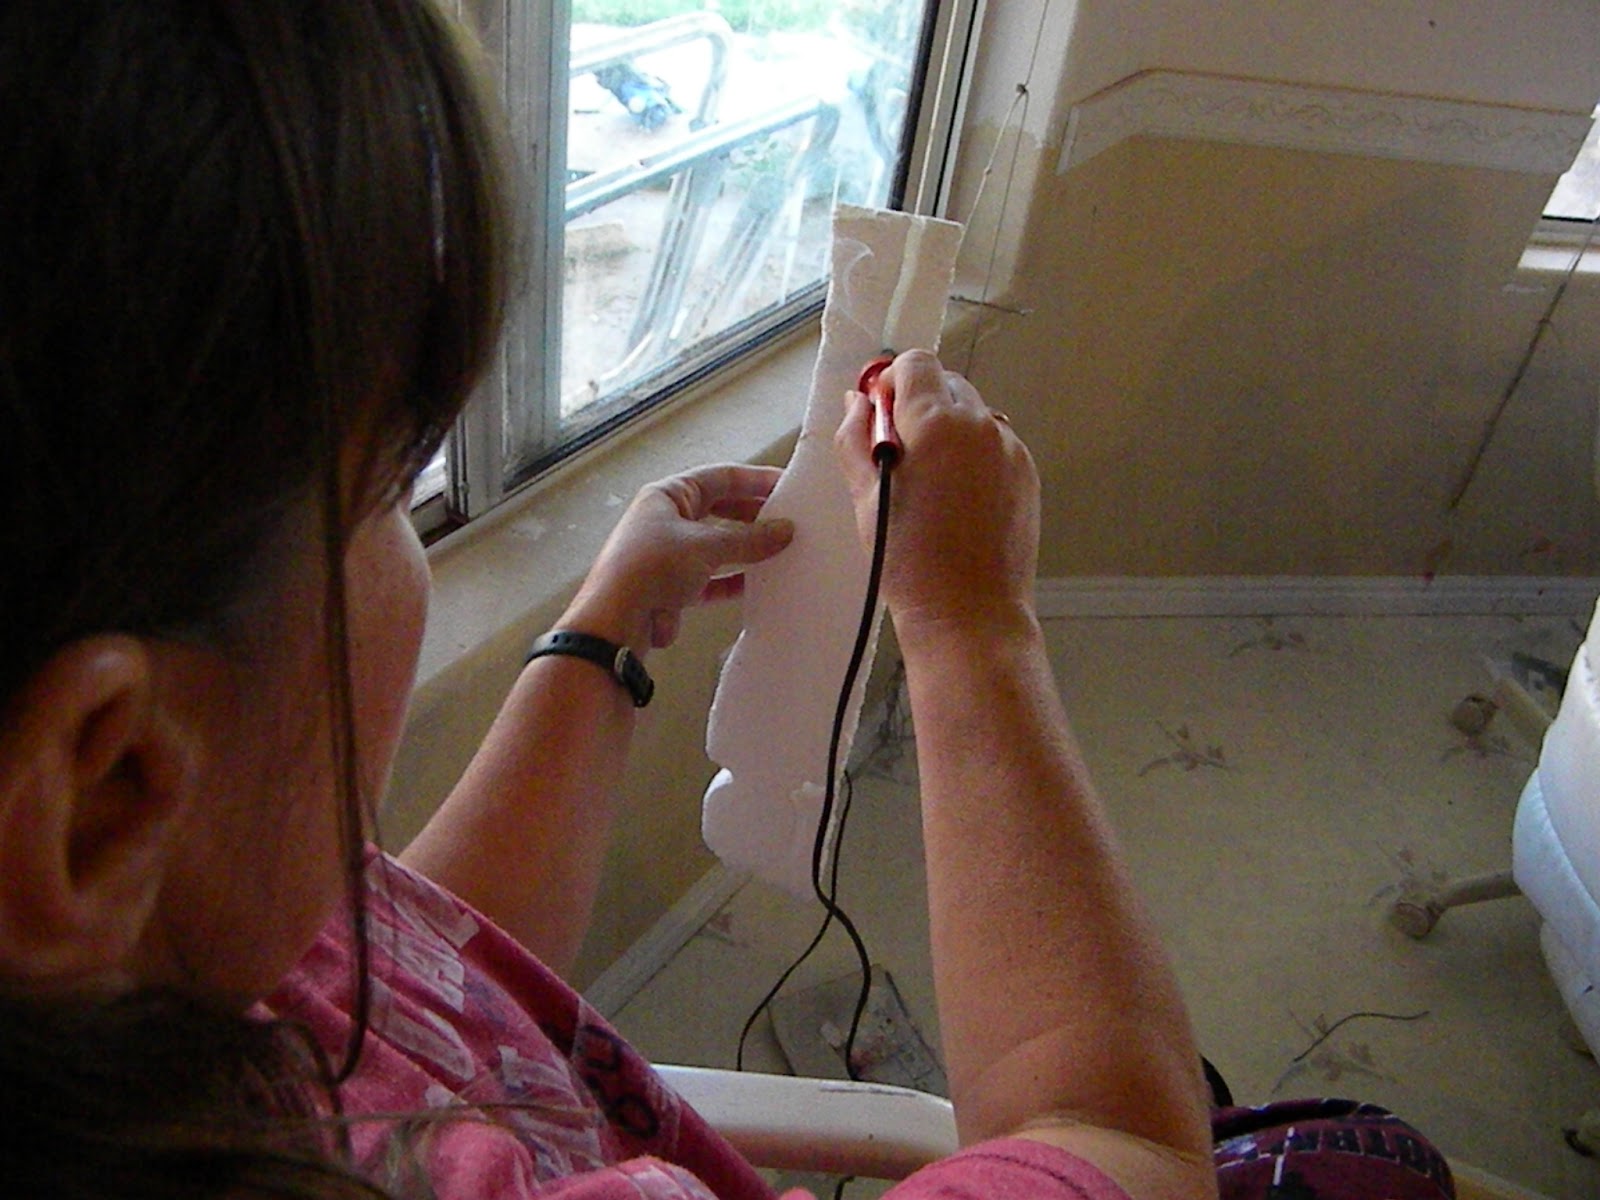
I use a soldering iron to carve the names in the "tiles."
Super easy and fast. Super stinky. Do this outside.

This video clip shows how easy it is to carve names in foam using a soldering iron.
I tricked my kids into thinking painting the letters was fun.
We used acrylic craft paint, cause that's all I had. It worked best when we watered it down just a little.
Spray paint would have been cheap and fast, but spray paint would have eaten the foam, and I didn't want that for this project.

The kids could paint the letters as sloppily as they wanted, since the paint roller cleaned it right up.

My hubby and I thought, "Oh, cool, we have this E-6000 glue that will work slick on this project!"
NOT!
Don't use E-6000.
Don't use E-6000.
It eats the foam faster than my kids eat cookies!

I got this "construction adhesive" at Wally's World
for $2. :)
In the paint dept.
caulk/super glue area,
caulk/super glue area,
but displayed with the caulk.

This is a vase I am gluing down for flowers.
I cut the vase out of leftovers of the foam.

I have had several rolls of magnetic sheeting sitting around my house for years. I think I got this from my father-in-law's stash and he passed away 16 years ago, so it's pretty old stuff.
We cut the 24" wide roll into 2" strips.
Two for each "tile".
I can't even tell you the mil on the magnet, but this was pretty thick and heavy.
We cut it with an exacto type knife on a
cutting mat from my sewing kit.

The magnet roll was brittle, so all we had to do was "score" it and it would snap apart at our cut marks.
It also was so "rolled" that it would not lay flat and
would not work well as "stickum".
My hubbies brilliant idea
(he gets those once in a while)
was to heat them up in a pot of boiling water....


I flattened them out on my fridge.

I know I went overboard with the glue,
but I wanted to make sure the magnets stayed put.
I weighted them down, so the magnet shapes would not
change their minds. :)
change their minds. :)

In order for the "tiles" to line up on my garage door,
I needed the magnets to be about 1/2 inch from the top and bottom edges to maximize their "stickum."

I aged them with black spray paint.

I needed a lightweight candy on a stick that would not disappear with the kiddos.
I got this pack of foam circles in the $1 section at K world.
They are also at the dollar store.
I cut them into tiny strips and braided them for a "swirled" look.
Glued it with hot glue.

I found some flowers at the dollar store
and taped them together in the arrangements I chose.

I used my soldering iron to cut the shape of each tooth
and the skull and the cross bones.

I used the soldering iron to cut the shape for the
K. Davver body as well.

I wrapped a double stack of foam body shapes
with strips of sheets and hot glue for the K Davver.
I think you can get small cooking utensils at the dollar store or W world.

My daughter had a duck sitting around from the dollar store.
I cut out the top part of the foam so the duck would sit closer to the "tile". I used construction glue to hold it down.


I got the skeleton at the dollar store.

Another skeleton.


Parts of yet another skeleton.
I used spray paint on D. Kaden instead of the wall paint, so it would melt the foam and give it an appearance of decaying tombstone.
(Yeah, I know, it doesn't really show up with the 32 "tiles" overload, but I thought I'd point out my thought process...)
I used spray paint on D. Kaden instead of the wall paint, so it would melt the foam and give it an appearance of decaying tombstone.
(Yeah, I know, it doesn't really show up with the 32 "tiles" overload, but I thought I'd point out my thought process...)


The "single" flower stem in a small vase was all Wilma's family could afford....get it?
In case you are worried about the garage door working, here is a shot of the garage door on its way up.

There is about 4" between the door frame and the garage door.
So, there's plenty of room for the props.
The magnets seem to hold firmly. I haven't had them come off yet after a week of mom taxiing.
(garage up.....garage down.....)
(garage up.....garage down.....)
But, I did put them up the day AFTER the massive wind storm.
We usually get at least 1 or 2 massive rain and wind storms in
my town in October.

DAY TIME:
NIGHT TIME:

DAY TIME WITH MY CEMETERY:

No comments:
Post a Comment